In this manual, we will walk through steps needed to submit an order in T-Portal. It is important to know that in T-Portal there are two types of customers based on when do they pay for the order. Customers can either be prepaid– submitting an order and pay for it in the process of submitting using Card or Wallet payment methods . Or postpaid– submitting an order directly and paying for it later.
Prepaid Orders
In case the customer was a prepaid customer, follow these steps to submit a prepaid order:
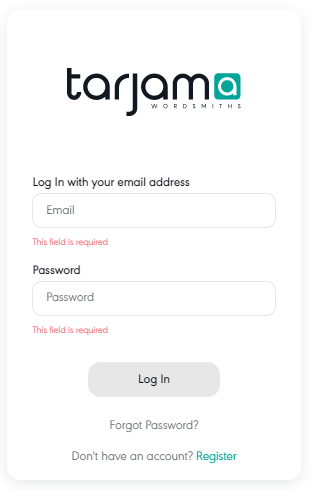
1.Login to T-portal using your credentials:
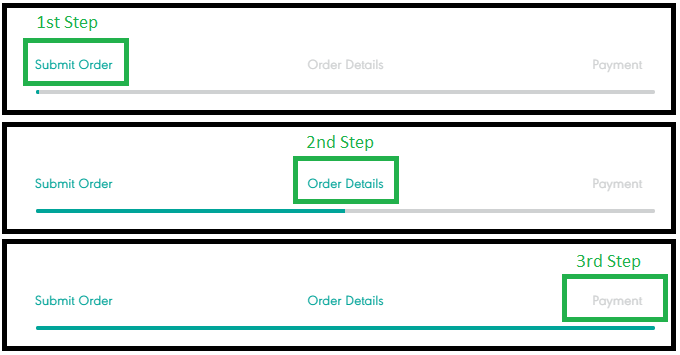
2.After logging in, you will be directed to the “Submit Order” page, which is the 1st out of 3 steps of submitting a prepaid order:
3.In the “Submit Order” step, you will be able to choose between services T-portal offers:
T-portal Services:

• Translation
• Machine Translation
• Proofreading
• Transcription
• Subtitling
• Content Writing
4.To Submit a Request (Translation):
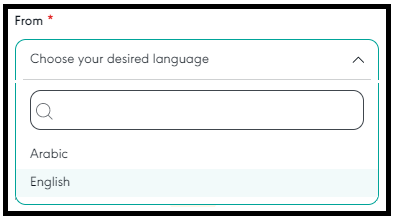
a. Clicking the dropdown list in the “From” section will display available source languages. Choose your desired source language by clicking on it.
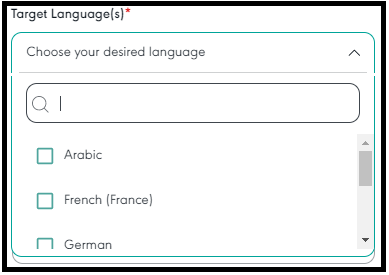
b. Clicking the dropdown list in the “Target Language(s)” section will display available target languages. Choose your desired target language(s) by checking the related checkbox.
c. In the “Upload a file or enter text” section, you can choose between uploading a file or entering text to be generated.
○ Uploading a file:
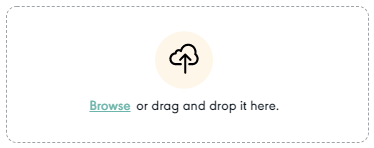
- • You can click “Browse” to browse your files and select the desired ones.
• Or you can drag and drop the desired files directly in the upload box.
• Make sure the uploaded file type is supported by T-portal, supported files are:
– DOCX
– XLXS
– CSV
– XML
– PDF
○ Generating text:
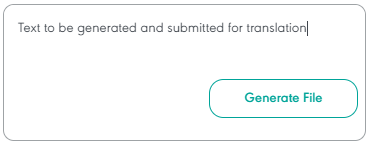
- • In the “Generate Text” text field, you can type/paste text to be translated, then click “Generate File” to generate a document containing your text. The default file name will be “my-text’, which you can change later in the “Order Details” step.
• You will be able to see your uploaded files, or generated text, listed right below the “Upload a file or enter text here” section:

d. In the “Word Count” section, you will be able to edit the word count after uploading. As automatic detection is not 100% correct due to different doc types.

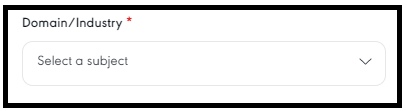
e. In the “Domain/Industry” section, you will be able to choose the subject of your file from a list of various domains and industries. Click the dropdown list to browse and select the desired subject.
f. Select DTP option if you need your uploaded file to be delivered in the same exact format. Note that extra charge of 25% will be applied.

g. If the file you uploaded contains images, or non editable text, that need to be translated, then select the related option. Selecting this service will alert our operations team to capture any non editable content and include it for translation. Note that, after analyzing the non editable content, the word count may significantly increase, and so the delivery date may be extended.

h. In the “Service Delivery” section, you can choose between “Rushed” and “Normal” services based on your desired delivery time. The “Rushed” service will be available for files with 3K or more words.
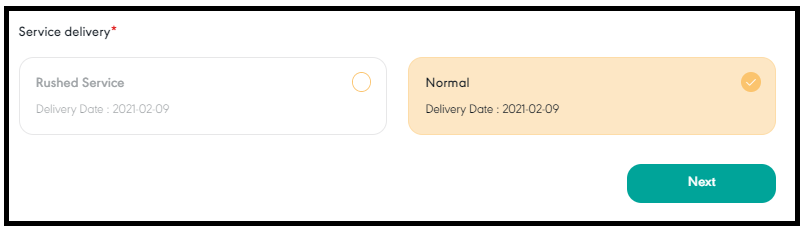
i. After selecting a service, click “Next” to choose your desired package:
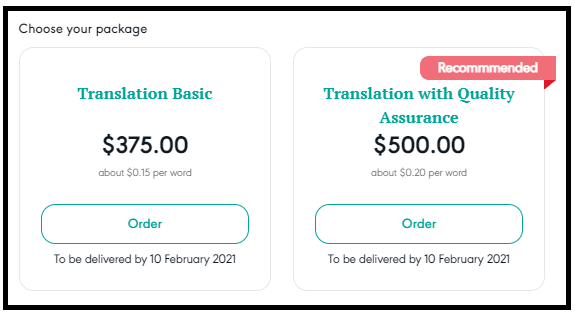
- • You can choose between “Translation Basic” or “Translation with Quality Assurance” Packages. Click on “Order“ to proceed to the 2nd step “Order Details“ .

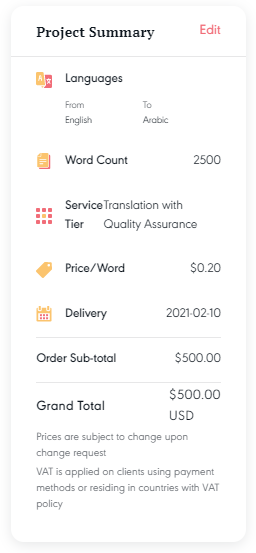
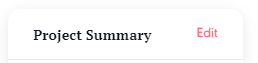
j. In the “Order Details“ page, you can have an overview of the project summary on the right.
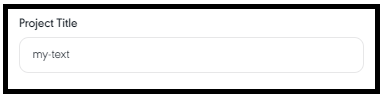
k. You can also rename the project in the “Project Title” section.
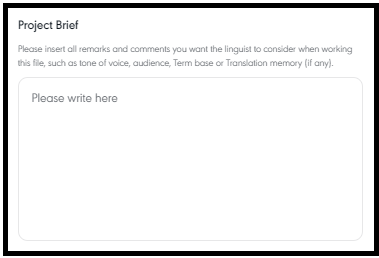
l. In the “Project Brief“ section, you can insert any remarks and comments you want the linguist to consider while working on the file, such as tone of voice, audience, term base or translation memory.
m. Below the project Brief section, you can see a list of your uploaded files along with their properties.

n. You can click on “Edit“ in the project summary to go back to the “submit” step.
• Proceed to the “Payment” step by clicking “next”. Or go back to the “Submit Order“ step by clicking “Back”.

• 3rd Step: Payment.

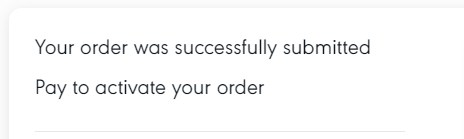
o. Reaching Payment step implies that your order was successfully submitted as indicated by the success message demonstrated below. And now you need to complete payment for your order to be activated.
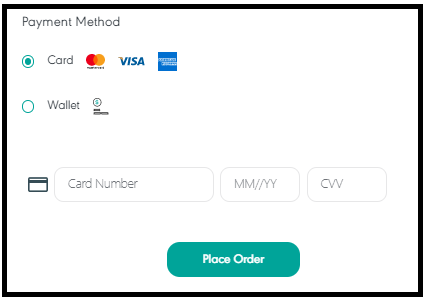
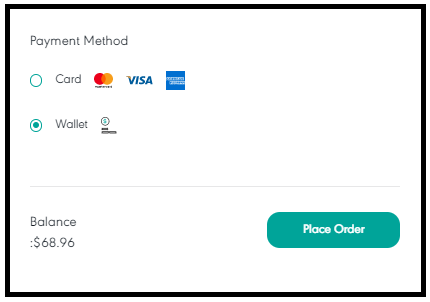
p. You can choose between Card and Wallet payment methods.
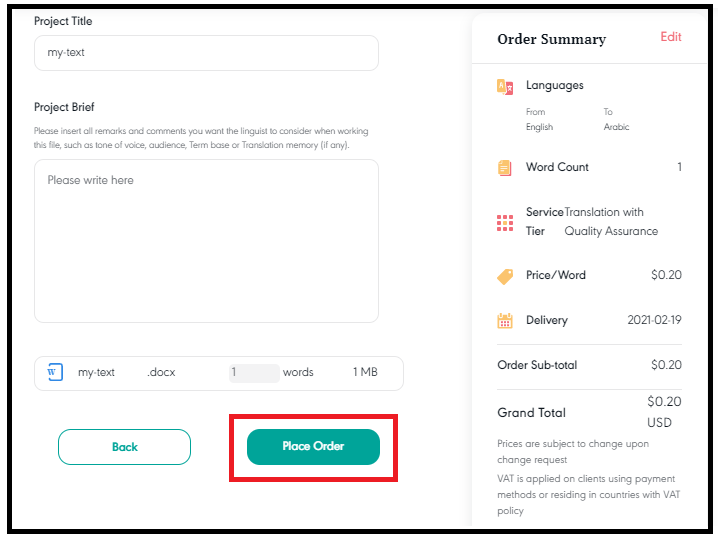
• Card Payment Method:
– Fill in the 16-digit card number, the card’s expiry date (month/year), and the card verification value CVV (the three-digit number located on the back of your Card).
– To Place your Order, click on “Place Order” after reviewing the Project Summary and Billing info section on the right.
• Wallet Payment Method:
– The Grand Total will be subtracted from your wallet.
– To Place your Order, click on “Place Order” after reviewing the Project Summary and Billing info section on the right.
• Clicking on “Place Order”, a message will be displayed indicating that you completed the payment step and that your order is now activated. You will also receive the invoice via email.
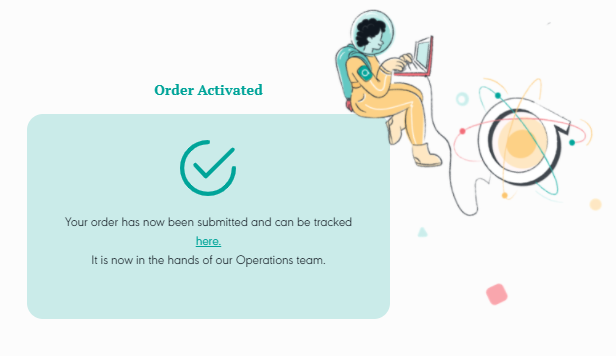
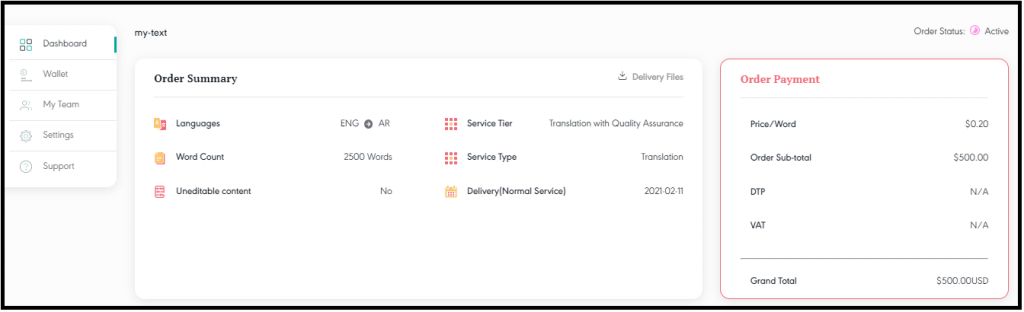
• Click on “here” in the body of the message to be directed to your order summary.

Postpaid Orders
In case the customer was a postpaid customer, follow these steps to submit a postpaid order:
1. Login to T-portal using your credentials:
2. After logging in, you will be directed to the “Submit Order” page, which is the 1st out of 2 steps of submitting a postpaid order:

3. Just like Postpaid orders, you will be able to choose between services T-portal offers In the “Submit Order” step:T-portal Services:

• Translation
• Machine Translation
• Proofreading
• Transcription
• Subtitling
• Content Writing
4. To Submit a Request (Translation):
• Repeat steps 4.a to 4.i mentioned in the first section of this manual “Prepaid Orders”.
5. After clicking on “Order“, you will be directed to the 2nd and final step “Order Details“ .

6. Repeat steps 4.i to 4.m mentioned in the first section of this manual “Prepaid Orders”.
7. You will notice that the “Next” button is now replaced by “Place Order” button, and that is because Order Details is the last step in submitting Postpaid Orders.
8. Clicking on “Place Order”, a message will be displayed indicating that your order is now activated. And you will also receive the invoice via email.

9. Click on “here” in the body of the message to be directed to your order summary.
Still stuck? Reach out to us at product.support@tarjama.com or raise a ticket here.